The BEST Cauliflower Crust Pizza!

9e200122d247165c8d23f6c8de809327

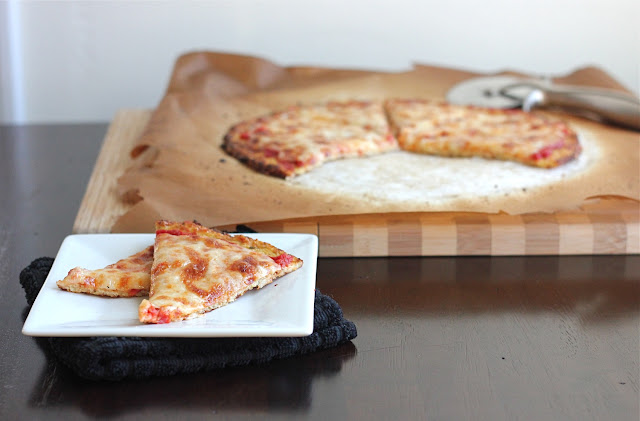
Yep. I’m making that claim and I’m sticking with it. This IS the BEST cauliflower pizza crust you will ever make. I’ve worked out the kinks from my previous cauliflower crust and from all other cauliflower crust posts I’ve read, and I’m confident that this pizza, this very one here, with a crust made out of a vegetable, is so damn delicious that you won’t even think twice about the whole crust being made out of a vegetable thing. And yes, you can slice it and pick it up like a real piece of pizza.

Now, let’s hold hands and dance.
If, despite my description and the holding hands and dancing, you are still feeling a little weird about the whole cauliflower crust thing, or maybe it was the holding hands and dancing that got you feeling weird? Well then all I can say is, you shouldn’t feel weird, about the pizza or the dancing,and this is picky husband taste tested and approved. Wait, let me say that one more time. This is PICKY HUSBAND taste tested and approved. And pizza is his FAVORITE food, so that was a tough test to pass. In conclusion, you MUST make this pizza, if not because it’s the BEST, like I’ve clearly stated, then at least because I woke up early on a work day and whipped out my food processor and camera and went to work on this JUST. FOR. YOU. Pizza at 7 am is totally normal. And delicious. Also, a trip to the grocery store in pajamas and slippers mid pizza making for an egg because your husband didn’t tell you he used the last one, all the while praying your food-crazed dog doesn’t knock over the bowl of cauliflower crust you left sitting precariously close to the counter’s edge is also totally normal.
SO, what are you waiting for?!!!
 Oh, yeah the recipe.
Since I’m guaranteeing the best cauliflower crust pizza, I want to make sure you get it right and don’t come back all hassling me for your money back and what not, so I’m going to do a little step by step, photo guide. (Well, except for the steps I forgot to take photos of… I had to run out and get eggs BEFORE work! There is only so much I can do people.)
Let’s get going…
Place a pizza stone in the oven, or baking sheet if you don’t have a pizza stone. Preheat oven to 450 degrees. On a cutting board, place a large piece of parchment paper and spray it with nonstick cooking oil.
Wash and throughly dry a small head of cauliflower. Don’t get one the size of your head unless you are planning on making 2 pizzas. Cut off the florets, you don’t need much stem. Just stick with the florets. Pulse in your food processor for about 30 seconds, until you get powdery snow like cauliflower. See above photo. You should end up with 2 to 3 cups cauliflower “snow” – In this case I ended up with 2 1/3 cups. Place the cauliflower in a microwave safe bowl and cover. Microwave for 4 minutes. Dump cooked cauliflower onto a clean tea towel and allow to cool for a bit before attempting the next step.
Once cauliflower is cool enough to handle, wrap it up in the dish towel and wring the heck out of it. You want to squeeze out as much water as possible. This will ensure you get a chewy pizza like crust instead of a crumbly mess. I got a 1/3 cup water out of this cauliflower.
Dumped cauliflower into a bowl. See how nice and light it is now, almost like flour! Well, kinda. Now add 1/4 cup parmesan cheese, 1/4 cup mozzarella cheese, 1/4 teaspoon kosher salt, 1/2 teaspoon dried basil (crush up the leaves even more between your fingers before adding), 1/2 teaspoon dried oregano (crush up the leaves even more between your fingers before adding), 1/2 teaspoon garlic powder (not garlic salt), and a dash of red pepper if you want. I also added 1 tablespoon almond meal because my cauliflower yielded closer to 2 cups of cauli snow, this is optional and I would not add the almond meal if you have closer to 3 cups of cauli snow. Now add your egg (and hopefully you made sure you had one before you started) and mix away. Hands tend to work best.
Once mixed together, use your hands to form the dough into a crust on your oiled parchment paper. Pat it down throughly, you want it nice and tightly formed together. Don’t make it too thick or thin either.
Now, using a cutting board slide the parchment paper onto your hot pizza stone or baking sheet in the oven. Bake for 8 – 11 minutes. Until it looks like this:
Delicious, right? Just wait till you add the toppings and finish it off! Now add however much sauce (Make your own 30 minute pizza sauce using my recipe!), cheese, and toppings you want. I’m not gonna give you measurements for this. You know how you like your pizza – so go for it! Slide parchment with topped pizza back in the hot oven and cook for another 5 to 7 minutes until the cheese is melted, bubbly, and slightly golden. Oh yes.
Test your patience and allow it to cool for a minute or two. Probably closer to two. Then using a pizza cutter and a spatula serve up your delicious grain-free cauliflower crust pizza!

Grain-Free Cauliflower Crust Pizza
makes one approx. 10-12 inch pizza
1 small to medium sized head of cauliflower – should yield 2 to 3 cups once processed
1/4 teaspoon kosher salt
1/2 teaspoon dried basil (crush it even more between your fingers)
1/2 teaspoon dried oregano (crust it even more between you fingers)
1/2 teaspoon garlic powder
optional a few shakes of crushed red pepper
1/4 cup shredded parmesan cheese
1/4 cup mozzarella cheese
1 egg
optional 1 tablespoon almond mealDesired amount of sauce, cheese for topping, and other toppings. Make your own 30 minute pizza sauce using my recipe!Place a pizza stone in the oven, or baking sheet if you don’t have a pizza stone. Preheat oven to 450 degrees. On a cutting board, place a large piece of parchment paper and spray it with nonstick cooking oil.

Wash and throughly dry a small head of cauliflower. Don’t get one the size of your head unless you are planning on making 2 pizzas. Cut off the florets, you don’t need much stem. Just stick with the florets. Pulse in your food processor for about 30 seconds, until you get powdery snow like cauliflower. See above photo. You should end up with 2 to 3 cups cauliflower “snow”. Place the cauliflower in a microwave safe bowl and cover. Microwave for 4 minutes. Dump cooked cauliflower onto a clean tea towel and allow to cool for a bit before attempting the next step.

Once cauliflower is cool enough to handle, wrap it up in the dish towel and wring the heck out of it. You want to squeeze out as much water as possible. This will ensure you get a chewy pizza like crust instead of a crumbly mess.

Dumped cauliflower into a bowl. Now add 1/4 cup parmesan cheese, 1/4 cup mozzarella cheese, 1/4 teaspoon kosher salt, 1/2 teaspoon dried basil (crush up the leaves even more between your fingers before adding), 1/2 teaspoon dried oregano (crush up the leaves even more between your fingers before adding), 1/2 teaspoon garlic powder (not garlic salt), and a dash of red pepper if you want. I also added 1 tablespoon almond meal because my cauliflower yielded closer to 2 cups of cauli snow, this is optional and I would not add the almond meal if you have closer to 3 cups of cauli snow. Now add your egg and mix away. Hands tend to work best.

Once mixed together, use your hands to form the dough into a crust on your oiled parchment paper. Pat it down thoroughly, you want it nice and tightly formed together. Don’t make it too thick or thin either.
Using a cutting board slide the parchment paper onto your hot pizza stone or baking sheet in the oven. Bake for 8 – 11 minutes, until it starts to turn golden brown. Remove from oven.
Add however much sauce, cheese, and toppings you want. I’m not gonna give you measurements for this. You know how you like your pizza – so go for it! Slide parchment with topped pizza back in the hot oven and cook for another 5 to 7 minutes until the cheese is melted, bubbly, and slightly golden.
Test your patience and allow it to cool for a minute or two. Probably closer to two. Then using a pizza cutter and a spatula serve up your delicious grain-free cauliflower crust pizza!*3/15 update – If you are using a larger sized cauliflower, up the eggs to 1 egg  plus 1 egg white. You want your “dough” to be sticky. When I make a bigger sized pizza (using more cauliflower) I up the seasonings and the egg, but often leave the amount of cheese the same. Make sure you pat the dough tightly together when forming your crust. It really helps to place the crust (on an oiled sheet of parchment paper) on a HOT pizza stone or baking sheet. Make sure the crust is golden in color before topping it and baking it again. I truly believe cooking it the proper length before topping it helps keep the crust together.
Also I really like the addition of 1 to 2 tablespoons of almond meal to the crust mixture.
*Disclaimer – the slices will still be kinda floppy, but they shouldn’t be crumbly.***UPDATE – My new oven requires that I pre-cook the crust for closer to 15 to 20 minutes to get it a nice golden brown. Go off of looks rather than time! You want the edges to start to be crispy brown but not too much so that when you cook it again after adding toppings it will burn.

FAQs:

  • Instead of microwaving you can steam the cauliflower just enough to get it slightly tender.
  • Instead of a food processor you can use a cheese grater to grate the cauliflower.
  • If you are looking for a dairy free version – Here is the link to my cheese free cauliflower pizza crust!
  • I highly recommend parchment paper over tin foil. Don’t use wax paper.
  • Yes, you can do without the pizza stone and use a baking sheet.
  • Yes, you can just wring out the cauliflower raw, but I recommend the cooking method and have had better success cooking the cauliflower before wringing it out.
  • People have had success with using a juicer on the cauliflower and extracting the pulp to use. I have not tried this.
  • The almond flower is optional. Coconut flour would be a good substitute, but both could be left out entirely with pretty much the same result.
Love, Luck, and Happiness!DUE TO THE POPULARITY OF THIS RECIPE, I HAVE TO ASK PLEASE DO NOT POST THIS RECIPE IN FULL ON ANY OTHER BLOG OR WEBSITE WITHOUT PROPER ACCREDITATION, AS WITH ANY RECIPE ON THIS SITE. Thank you! 🙂

Trackbacks

Leave a Reply

Your email address will not be published. Required fields are marked *

This site uses Akismet to reduce spam. Learn how your comment data is processed.